How to Fix Shingles That Are Lifting in West Palm Beach, Florida

How to Fix Shingles That Are Lifting in West Palm Beach, Florida

West Palm Beach, Florida, is known for its sunny weather, scenic coastlines, and tropical storms. While the climate has its perks, the intense heat and seasonal storms can take a toll on your roof. If you’ve noticed that some shingles are lifting, it’s crucial to address the issue promptly to prevent water damage, mold growth, or structural issues. In this article, we’ll walk you through the reasons shingles lift, how to fix them, and why it’s important to hire a professional roofer in West Palm Beach for the job.

a roof shingle lifting and in need of repair

Why Do Shingles Lift?

Before diving into the solutions, it’s important to understand why shingles lift in the first place. Identifying the root cause ensures that you not only fix the problem but also prevent it from recurring. Common reasons include:

  1. Wind Damage
    West Palm Beach is no stranger to strong winds, especially during hurricane season. High winds can loosen shingles, causing them to lift or even detach entirely.
  2. Improper Installation
    If shingles were not nailed down correctly or if the adhesive didn’t set properly, they are more likely to lift over time. Poor installation practices are often seen in older roofs or when unqualified contractors do the job. For qualified and reputable contractor, you may visit https://starroofingcontractors.com/.
  3. Aging Roofs
    Over time, shingles can deteriorate due to prolonged exposure to the sun’s UV rays and Florida’s humid conditions. Aging shingles lose their flexibility and adhesive strength, making them prone to lifting.
  4. Moisture or Poor Ventilation
    West Palm Beach’s humid climate can lead to moisture buildup under the shingles, especially if the attic lacks proper ventilation. This can weaken the adhesive, causing the shingles to lift.

How to Fix Lifting Shingles

Fixing shingles that are lifting is a straightforward process when done correctly. However, it requires the right tools, materials, and techniques to ensure a durable and weather-resistant result. Here’s a step-by-step guide:

1. Inspect the Roof

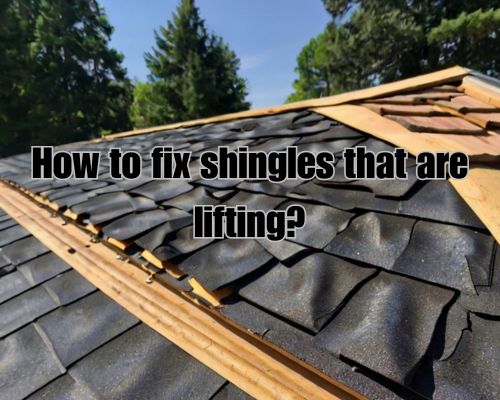
Start by conducting a thorough inspection of your roof. Look for lifting shingles, curled edges, or missing granules. Pay close attention to shingles near the edges of your roof, as these are more vulnerable to wind damage.

2. Gather Materials

To fix lifting shingles, you’ll need the following:

  • Roofing nails
  • Roofing adhesive
  • Hammer
  • Putty knife
  • A sturdy ladder
  • Safety gear

Ensure you choose materials that are designed to withstand the unique weather conditions in West Palm Beach. For example, opt for roofing adhesive rated for high humidity and heat resistance.

3. Secure the Lifting Shingle

Gently lift the affected shingle with a putty knife to assess the condition of the underlying adhesive. Apply a generous amount of roofing adhesive underneath the shingle, ensuring complete coverage.

4. Nail It Down

Using roofing nails, secure the shingle back in place. Make sure the nails are driven in at the right angle and depth to avoid cracking or damaging the shingle.

5. Seal the Edges

Apply a final layer of roofing adhesive along the edges of the shingle to create a watertight seal. Press down firmly and let the adhesive cure as per the manufacturer’s instructions.

When to Call a Professional Roofer in West Palm Beach

While DIY repairs can be effective for minor issues, certain situations call for the expertise of a licensed roofing contractor. Here’s when you should consider hiring a professional:

  1. Widespread Damage
    If multiple shingles are lifting across your roof, it could indicate a larger issue, such as structural damage or widespread aging. A professional roofer, see https://starroofingcontractors.com/ can assess the full extent of the problem and recommend the best course of action.
  2. Lack of Experience
    Roof repairs require skill and experience to ensure long-lasting results. If you’re unfamiliar with roofing techniques, it’s best to leave the job to the experts to avoid further damage.
  3. Safety Concerns
    Climbing onto a roof can be dangerous, especially in windy or wet conditions. Professional roofers in West Palm Beach have the necessary safety equipment to perform repairs safely.

Preventing Future Shingle Issues

After fixing the lifting shingles, it’s essential to take proactive steps to prevent the problem from recurring. Here’s how:

1. Schedule Regular Roof Inspections

In West Palm Beach, it’s recommended to have your roof inspected at least twice a year and after major storms. Regular inspections can help identify potential issues before they become costly repairs.

2. Ensure Proper Ventilation

Adequate attic ventilation is critical for preventing moisture buildup that can weaken shingles. Consult a professional roofer to evaluate your home’s ventilation system.

3. Invest in High-Quality Shingles

Choose shingles that are designed for Florida’s climate. Look for materials with UV protection and high wind ratings to ensure durability.

4. Trim Overhanging Trees

Overhanging branches can rub against your roof and cause shingles to lift. Regularly trim trees near your home to reduce the risk of damage.

Why Choose a Local Roofer in West Palm Beach

When it comes to roof repairs, working with a local contractor, see https://starroofingcontractors.com/, offers several benefits:

  1. Knowledge of Local Weather
    Local roofers understand the unique challenges posed by West Palm Beach’s weather, including high humidity and tropical storms. They can recommend materials and techniques that are best suited for the area.
  2. Familiarity with Building Codes
    Roofing contractors in West Palm Beach are familiar with local building codes and regulations, ensuring that your repairs meet all requirements.
  3. Quick Response Times
    In case of emergencies, a local roofer can provide prompt service to prevent further damage to your home.

Cost of Fixing Lifting Shingles in West Palm Beach

The cost of repairing lifting shingles in West Palm Beach can vary based on factors such as the extent of the damage, the type of shingles used, and labor costs. On average, homeowners can expect to pay between $150 and $500 for minor repairs. For more extensive damage, costs can range from $1,000 to $3,000.

While it may be tempting to choose the cheapest option, investing in quality repairs ensures long-term durability and protection for your home.

Conclusion

Fixing shingles that are lifting is essential to maintaining the integrity of your roof and protecting your home from Florida’s unpredictable weather. While minor repairs can be handled with the right tools and knowledge, hiring a professional roofer in West Palm Beach is the best way to ensure lasting results.

Whether it’s addressing storm damage or performing preventative maintenance, taking action promptly can save you from costly repairs down the line. Don’t let lifting shingles compromise your home—schedule an inspection today and safeguard your property for years to come.

By incorporating these steps and working with a trusted local contractor, you can enjoy peace of mind knowing your roof is in top condition.

What Colour Cabinets Have the Best Resale Value? Expert Insights and Tips

What Colour Cabinets Have the Best Resale Value? Expert Insights and Tips

When considering a home makeover with resale value in mind, the kitchen incredibly influences potential buyers. The colour you choose for your kitchen cabinets can significantly impact how welcoming and appealing the space feels.

White often stands out as the top choice for boosting resale value, thanks to its timeless, versatile and clean look. This colour suits a range of styles, allowing prospective buyers to visualise their own personal touches easily.

A modern kitchen with white cabinets, stainless steel appliances, and marble countertops

Kitchens with light grey cabinets offer a modern and elegant feel. This colour pairs well with various hardware options, providing flexibility in achieving either a contemporary or a traditional look.

On the other hand, dark-coloured cabinets can be stylish, but they might deter some buyers who perceive them as a commitment to a particular aesthetic.

Choosing the right cabinet colour involves balancing your personal style with broader buyer preferences. While current trends like light grey and blue offer attractive alternatives, white consistently proves to have the broadest appeal, see https://morningtoncabinetmakers.com.au/.

Consider how these choices complement the entire room layout to ensure you create a space that feels inviting and adaptable.

Determining Factors for Resale Value

Choosing the right cabinet colour significantly impacts a home’s overall real estate potential. Understanding how cabinets influence kitchen design choices is key to attracting prospective homebuyers.

Importance of Kitchen in Real Estate

The kitchen is often considered the heart of the home, serving as a central hub for family gatherings and entertainment.

When selling your house, a well-designed kitchen can substantially boost its resale value.

Real estate experts highlight that potential buyers prioritise the kitchen during home inspections. Features such as updated appliances, quality cabinetry, and modern finishes are frequently top-of-mind.

An attractive kitchen can set your home apart in a competitive market, making it crucial to invest in appealing design features.

Role of Cabinet Colour in Kitchen Appeal

Cabinet colour is a focal point in any kitchen design, influencing the room’s overall aesthetic.

Neutral tones like whites and greys tend to attract a wider audience and suit a variety of interior styles.

White cabinets are particularly popular due to their timelessness and their ability to make spaces feel larger and brighter. They offer a blank canvas that allows buyers to envision personal decor and style preferences.

In contrast, dark or overly bold colours can make a kitchen feel confined and may restrict buyers’ imaginations, potentially diminishing desirability.

Optimal Cabinet Colours for Resale

When preparing your home for resale, choosing the right cabinet colour can make a significant impact. Opting for versatile and appealing colours can attract a broader audience, increase the perception of space, and potentially enhance resale value.

Neutral Tones and Their Versatility

Neutral colours like white, grey, and greige offer wide appeal due to their flexibility in various design styles.

A white kitchen provides a timeless and clean look, making small spaces appear larger. Light neutrals can seamlessly blend with a range of decor styles, from traditional to modern kitchens.

Grey kitchen cabinets, especially in lighter shades, pair beautifully with both warm and cool accents, providing a sophisticated backdrop.

Benefits:

  • Blend with diverse aesthetics
  • Enhance perceived kitchen size
  • Offer a blank canvas for buyers

Trending Cabinet Colours and Their Impact

Staying updated with trending colours can also influence buyers.

Soft blues and natural wood tones are gaining popularity.

Blue kitchens, especially in muted tones, add a contemporary flair and are seen as calming.

Dark colours, although stylish, may deter some buyers due to their commitment and potential cost to repaint. Meanwhile, natural wood brings warmth and an organic feel, but ensure it complements the overall home aesthetic, see https://morningtoncabinetmakers.com.au/ for more.

Considerations:

  • Match trends with a timeless appeal
  • Avoid overly bold colours that may not suit every buyer

Eco-friendly and Low-VOC Cabinet Options

With growing awareness around sustainability, eco-friendly cabinet finishes are becoming essential.

Using low-VOC paints ensures you reduce volatile organic compounds. This promotes cleaner air quality.

Choosing sustainable materials not only appeals to environmentally conscious buyers. It can also give your kitchen a modern edge.

Opting for paint brands known for their eco-friendly practices can provide peace of mind. It also aligns with current health and wellness trends.

Key Points:

  • Appeal to eco-conscious buyers
  • Contribute to healthier indoor air quality
  • Align with sustainable living trends

How Long Do Custom Kitchen Cabinets Last? Understanding Lifespan and Durability

How Long Do Custom Kitchen Cabinets Last? Understanding Lifespan and Durability

When investing in custom kitchen cabinets, it’s crucial to know how long they’ll serve you. The lifespan of your cabinets can greatly depend on factors such as the quality of materials used and the level of maintenance they receive.

With proper care, high-quality custom kitchen cabinets can last for at least 25 years.

a durable kitchen cabinet built

These cabinets aren’t just about durability; they offer a blend of style and functionality tailored to your specific needs. Understanding the longevity of your cabinets allows you to appreciate the reliability and craftsmanship that go into creating bespoke designs suited to your kitchen space.

By choosing quality materials and ensuring regular maintenance, you can significantly extend the life of your kitchen cabinets.

Whether you are planning a kitchen remodel or purchasing cabinets for the first time, knowing what to expect in terms of durability will help you make an informed decision, see https://morningtoncabinetmakers.com.au/.

Factors Influencing the Longevity of Kitchen Cabinets

The lifespan of kitchen cabinets is influenced primarily by the materials used, the level of maintenance, and the surrounding environmental conditions. Each factor plays a critical role in determining how long your cabinets will endure without significant wear or damage.

Materials and Construction

The materials used in the construction of kitchen cabinets significantly affect their durability. Solid wood cabinets, such as oak or maple, offer superior longevity due to their hardiness and ability to withstand regular use.

Plywood cabinets provide a balance between affordability and durability, often outlasting many other engineered options. In contrast, MDF (medium-density fibreboard) and laminate cabinets are generally less durable, though they can be cost-effective choices for low-impact usage.

The construction techniques also contribute to cabinet longevity. Features like dovetail joints in the drawers enhance strength and resistance to wear over time.

Investing in high-quality materials and craftsmanship can ensure your cabinets last for several decades.

Maintenance and Care

Regular maintenance plays a vital role in extending the life of your kitchen cabinets.

Routine cleaning with gentle, non-abrasive cleaners prevents dirt build-up and surface damage, while using appropriate cleaning tools can avoid scratches.

Immediate attention to any water damage, especially in kitchens, is crucial as prolonged exposure can warp materials and cause swelling, particularly in MDF and laminate cabinets.

Cabinet refinishing can rejuvenate the appearance and protect the integrity of the wood. Reapplying finishes like varnish or paint not only improves aesthetics but also shields against moisture and everyday wear, visit https://morningtoncabinetmakers.com.au/ for more.

Environmental Influence

The environment in which your cabinets exist can impact their longevity.

Kitchens subject to high humidity levels or rapid temperature changes can cause materials to expand and contract, undermining cabinet integrity.

Controlling environmental conditions effectively with good ventilation and stable temperatures can mitigate these effects.

Direct sunlight exposure may lead to fading or discoloration, particularly in laminate and certain wood types. Strategically using blinds or curtains to protect cabinets from harsh sunlight can preserve their appearance and durability over time.

Maintaining optimal storage conditions will minimize environmental stressors that could otherwise reduce cabinet longevity.

When to Consider Cabinet Replacement or Refacing

Choosing between cabinet replacement or refacing involves evaluating the existing condition, potential benefits, size of renovations, and cost-effectiveness. Each approach has specific circumstances where it may be more suitable, depending on condition and fitting with your overall home improvement strategy.

Assessing Cabinet Condition

Understanding the current state of your cabinets is crucial in making an informed decision. Check for structural issues such as water damage or warping that might necessitate replacement rather than just refacing.

If your custom cabinets are high-quality and structurally sound but show wear in finishes or hardware, you might only need refacing. But if you have stock cabinets that are extensively damaged, replacement could be the better option.

Refacing Versus Replacement

Deciding between refacing and replacing involves weighing the benefits and costs.

Cabinet refacing is typically more cost-effective, often being 30% to 50% less expensive than a full replacement. It involves updating the exterior with new doors and veneer, leaving the structure intact.

Replacement is necessary when significant damage or a full redesign is needed. This option allows you to select new materials and styles, which can dramatically transform your kitchen. Consider replacement for outdated or low-quality stock cabinet structures.

Planning Your Home Improvement

When planning a kitchen renovation, factor in how changes align with your overall home improvement goals.

Refacing offers a quicker, less disruptive process. This is ideal if you’re looking to update aesthetics without a major renovation.

Consider the kitchen’s functionality. If layout changes are needed, replacement might be more suitable.

Set a budget that reflects potential costs and long-term value. Include possible hardware upgrades with refacing to enhance functionality.

For new designs or layouts, replacement provides a full refresh and possibly more resale value.

Each option should reflect your specific needs and long-term home improvement strategy. Make sure to balance cost, effort, and desired outcome.

What are Gutter Pipes Called? Understanding Their Varied Names

What are Gutter Pipes Called? Understanding Their Varied Names

When it comes to perfecting your home’s drainage system, understanding what gutter pipes are called is crucial.

In the world of guttering, these pipes are often known as downspouts or downpipes. They are integral components that guide rainwater from the roof to the ground. Having a functional rain gutter system protects your home by efficiently channelling water away from the foundation.

a gutter pipe of a home

In addition to downspouts, other essential parts of a gutter system play significant roles.

The gutter itself collects rainwater as it runs off the roof, while gutter guards prevent leaves and debris from clogging the pathways. Support mechanisms like brackets and straps ensure stability, which is vital for maintaining long-term effectiveness.

Each part is designed to enhance the durability and performance of your home’s rain guttering setup, refer to https://gutter-cleaning-melbourne.com.au/.

Components of a Gutter System

A modern gutter system is designed to efficiently manage rainwater collection and diversion. You’ll find a range of specialised components, each playing a vital role in maintaining home integrity by preventing water damage, foundation erosion, and flooding.

Gutters and Downpipes

The primary elements in your gutter system include gutters and downpipes.

Gutters are typically positioned along the roof’s edge, serving to capture and channel rainwater. Meanwhile, downpipes or downspouts vertically transport this water from the gutter to the ground or drainage system.

You may find elbows in the piping to redirect water flow, while a drop outlet connects the gutter to the downpipe. End caps are used to prevent water from escaping the ends of gutters.

Hangers, Brackets, and Straps

These components provide essential support to your gutter system.

Hangers hang the gutter beneath the edge of the roof, while brackets like the fascia bracket serve to secure them firmly, enhancing stability.

Some systems use straps or pipe cleats, which anchor the downpipes to your home’s exterior walls. The stability these parts provide helps ensure that gutters function correctly under the weight of rainwater or potential debris obstruction.

Gutter Guards and Leaf Relief

Gutter guards and leaf relief systems are designed to keep debris out of the gutter channels.

These components prevent leaves, twigs, and other detritus from clogging pathways, which can lead to overflow or water damage. Options vary from mesh screens to foam inserts, all tailored to enhance water flow efficiency. Opting for such preventive measures can reduce maintenance and prolong the lifespan of the gutter system, see https://gutter-cleaning-melbourne.com.au/.

Materials and Installation

Understanding the materials used in gutter pipes and the techniques for their proper installation is essential for effective water management. This section explores various materials including aluminum and copper gutters, and delves into important aspects of their installation.

Materials Used in Gutter Systems

Gutter materials, such as aluminum, copper, and lead, offer distinct advantages.

Aluminum gutters are lightweight and resistant to rust, making them a popular choice for many homes. They are easy to install and maintain, and you can paint them to match your home’s exterior.

Copper gutters provide a unique aesthetic with their natural patina over time, adding character to your home. While they are durable and long-lasting, they require careful installation due to their weight and cost.

Lead gutters, though less common today, offer excellent malleability and resistance to corrosion. Seamless gutters, often made from these materials, reduce leak points and require custom fabrication for each roof.

Installation Techniques and Pitch Consideration

Proper installation of your gutters is crucial for efficient drainage. It involves securing gutters to the fascia board along the eaves of your roof.

The pitch or slope of the gutters must be carefully calculated. This ensures water flows correctly towards the downspouts without overflowing.

Slopes are usually set at a minimum of 1/4 inch per 10 feet. This pitch ensures debris is less likely to accumulate and water drains effectively.

Ensuring that the installation conforms to your roof’s design and local weather conditions will maximise efficiency and longevity.

Having a professional handle the installation can help in achieving the best results.

How Many Downpipes Do I Need in Australia? A Comprehensive Guide

How Many Downpipes Do I Need in Australia? A Comprehensive Guide

Understanding how many downpipes you need for your project in Australia is crucial for effective roof drainage and can prevent potential water damage.

The number of downpipes required is influenced by factors such as roof size, slope, and local rainfall intensity. These standards suggest using a calculator or seeking professional guidance to determine specific requirements, ensuring you meet both functional and regulatory needs.

A suburban Australian house with multiple downpipes attached to the gutters, leading water away from the roof

In construction and design, both the gutters and downpipes must be correctly sized and installed. This ensures that water is efficiently channeled away from your property.

Changes introduced in the NCC 2022 have revised these requirements, including specifications like bracket support and freeboard limits in gutters.

This adaptation highlights the importance of using updated resources and calculations for optimal results in your project.

Using tools such as a gutter and downpipe calculator can assist in planning.

These help by considering factors like the roof’s catchment area and chosen pipe size.

Consistent sizing of downpipes across a project often simplifies installation, but the specifics might vary based on your unique roof layout and environmental conditions.

Such considerations guarantee that you not only comply with regulations but also maximize the effectiveness of your drainage system.

Assessing Roof Drainage Requirements

“Proper roof drainage is essential to prevent water accumulation and ensure adequate stormwater management. This involves assessing factors such as catchment areas, rainfall intensities, and appropriate gutter and downpipe sizes.” said Steve Arnie of Gutter Cleaning Melbourne Co.

Determining Downpipe Size and Quantity

To determine the correct downpipe size and quantity, start by calculating your roof’s catchment area, which includes the entire surface directing water towards the gutter.

You can find guidance in the Australian Standard AS/NZS 3500.3:2021 for stormwater drainage systems, which outlines the requirements for downpipe sizes based on roof areas and associated rainfall intensity.

Consider the Annual Exceedance Probability (AEP) for your location, which helps estimate how often a particular rainfall intensity might occur each year.

This data is critical to choosing downpipe capacities that can handle peak rainfall events.

Use tools such as the NCC 2022 Volume Two GDO Calculator to input your location and obtain recommendations for downpipe numbers and sizes suitable for maintaining proper drainage.

Selecting Gutters and Downpipes

Choosing appropriate gutters involves evaluating your roof design and selecting gutter types that can manage projected water volumes.

Valley gutters, for example, should be installed near roof valleys to handle water flow from pitched areas.

The gutter cross-sectional area is another consideration, influencing how much water it can carry without overflowing.

When selecting downpipes, ensure they are compatible with your chosen gutter type and can accommodate the expected water volume dictated by your catchment area. For more, see Steve Arnie of Gutter Cleaning Melbourne Co.

Consider both the gutter and downpipe sizes and always refer to the National Construction Code (NCC) 2022 requirements to ensure compliance.

Use a calculator for rainfall intensity to confirm the setup is suitable for strong storms prevalent in your region.

Installation and Compliance

When installing downpipes in Australia, focus on ensuring effective drainage and meeting regulatory standards.

Consider factors like roof design, gutter sizes, and specific plumbing codes to successfully achieve optimal performance.

Designing for Effective Drainage

Your roof design and slope play a critical role in how well water is channeled to the downpipes.

A steeper roof can accelerate water flow, requiring fewer downpipes, while flatter roofs may demand more.

Select the appropriate gutter sizes and types, such as eaves gutters or box gutters, to accommodate your building’s unique needs and the likely volume of water from rainfall events.

Ensure gutters are free from obstructions by considering stop ends and flashing. This will help prevent overflow, especially where water flows are concentrated, like valley gutters.

For additional efficiency, take into account the nominal and internal diameters of your gutters and downpipes which influence how much water can be effectively managed.

Ensuring Regulatory Compliance

In Australia, compliance with regulations such as the National Construction Code (NCC) 2022 and the plumbing code AS/NZS 3500.3 is mandatory.

These standards specify how downpipes should be installed and the number required according to roof area.

Downpipes should typically not serve more than 12 metres of gutter length each.

Proper positioning near valley gutters ensures efficient drainage and water management.

Use overflow measures to accommodate excessive rainfall and avoid water damage to the building.

Secure downpipes with appropriate brackets, taking care to fix them securely at corners and other critical points.

These actions contribute to meeting the required standards and ensuring long-term functionality.

Additional Considerations for Downpipe Efficiency

Consider the environmental factors. For example, your location near the sea or elders’ land may require additional protective features against corrosion or aesthetic restrictions.

Expansion joints can be beneficial for accommodating changes in length due to temperature variations. They help ensure the integrity of the system.

Installing extra features like leaf guards keeps your gutters cleaner. This reduces maintenance needs and improves efficiency.

Regular maintenance and inspection can preempt potential issues. This can prolong the life of your drainage system and ensure efficient performance.

Focus on these specifics to ensure your downpipe installation is both efficient and compliant with Australian regulations.

Can I Change My Own Taps in Australia? A Clear Guide to DIY Plumbing

Can I Change My Own Taps in Australia? A Clear Guide to DIY Plumbing

Changing your own taps in Australia can be a straightforward task if you’re dealing with minor plumbing work. You are allowed to undertake simple tasks like replacing taps and showerheads without needing a licence. This gives you the freedom to handle easy repairs and save on potential costs from hiring professionals for these minor jobs.

homeowner replacing his home tap

It’s important to approach each job with the right tools and knowledge. If the taps are difficult to remove, or you encounter unexpected issues, seeking advice or assistance from a licensed plumber might be necessary to prevent any damage. Remember, tackling plumbing problems requires patience and a bit of persistence.

Engaging in DIY repairs can be satisfying and empowering. Before embarking on your tap replacement project, ensure you understand the steps involved and the regulations that apply. By preparing thoroughly, you not only ensure the success of your project but also gain valuable skills for future plumbing challenges, see https://gutter-cleaning-melbourne.com.au/.

Understanding Plumbing Regulations in Australia

When considering DIY plumbing projects, it’s crucial to understand the regulations governing plumbing work in Australia. Various laws and guidelines dictate who can perform certain tasks and under what conditions. This ensures safety and compliance with established standards.

Licensing Requirements for Plumbing Work

To legally carry out plumbing work in Australia, you typically need to be a licensed plumber. Licenses ensure that individuals have the necessary skills and knowledge to perform plumbing tasks safely. Each state has specific requirements for obtaining a plumbing license, including apprenticeships and exams.

Even simple tasks like changing taps can require a licensed professional if they involve significant sanitary drainage works. DIY plumbing is often limited to non-structural maintenance tasks like replacing washers or shower heads.

Australian Plumbing Codes and Standards

The Australian Plumbing Code, part of the National Construction Code (NCC), outlines the essential safety requirements for plumbing installations. This code applies across states and ensures all plumbing work meets strict safety and performance standards.

Australian Standards 3500 covers various plumbing aspects, including hot water and sanitary drainage systems. Compliance with these standards is crucial to avoid costly errors and safety hazards when performing any plumbing work.

Local Government and QBCC Guidelines

Local governments in Australia have additional guidelines tailored to community-specific needs. These guidelines cover aspects such as lawn watering systems and irrigation systems. They clarify what is permissible as DIY and when a licensed plumber is needed.

In Queensland, the Queensland Building and Construction Commission (QBCC) provides detailed rules on plumbing compliance. They issue compliance certificates for completed work and regulate standards to ensure consumer safety and quality in plumbing services.

Adhering to local regulations also involves understanding the specific sanitary drain requirements in your area, including any permit needs. Consult your local council or the QBCC for detailed information and guidance.

Practical Guide to DIY Tap Maintenance

Changing taps can be a rewarding project for home improvement enthusiasts. With the right tools and understanding of the tap’s basic structure, you can handle minor repairs and replacements. While DIY solutions can be quite effective, there are times you might need a professional’s expertise.

Tools and Materials Needed

To get started, gather the essential tools:

  • Adjustable wrench for loosening or tightening nuts.
  • Screwdrivers to handle different types of screws.
  • Thread seal tape to ensure water-tight connections.
  • Replacement parts like tap washers, jumper valves, and O-rings.
  • Bucket and towels to manage excess water and keep your workspace dry.

Consider stocking extra items like a tap reseating tool for smoothing valve seats, and a suction cup to grip parts securely. For more, see https://gutter-cleaning-melbourne.com.au/.

Step-by-Step Process for Tap Repair

Start by turning off your water supply using the isolating valve. This step prevents water spillage. Next, remove the tap handle, often held in place by a screw. After that, carefully unscrew the tap bonnet to access the internal components.

Inspect the tap washer and other worn components like the jumper valve. Replace these if they show signs of wear, such as flattening or corrosion. Apply new thread seal tape to all threads before reassembling.

When reassembling, ensure each part is tightly secured, but avoid over-tightening which might damage components. Once done, turn the water back on and check for leaks.

When to Call a Professional Plumber

DIY repairs can be effective, but you need to know when to call a professional plumber. For example, persistent leaks after replacing parts might indicate a more complex issue. This could be something like a backflow prevention device failure or deep corrosion.

Tasks like installing mixer taps or a new toilet cistern are better handled by professionals to avoid errors. If you encounter issues with the water supply connection or face complications beyond standard repairs, reaching out to a plumber ensures safety and proper function of your systems.

-