How Do I Choose Cabinet Size? A Comprehensive Guide for Mornington Homeowners
How Do I Choose Cabinet Size? A Comprehensive Guide for Mornington Homeowners
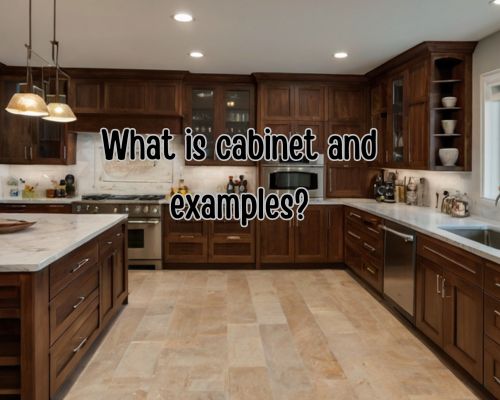
When it comes to designing your perfect kitchen or renovating your storage spaces, one of the most important considerations is choosing the right cabinet size. Cabinets are more than just functional storage—they also contribute to the overall aesthetics and efficiency of your home. If you’re in Mornington, Australia, this guide will help you make informed decisions to match your space, style, and needs.
Understanding Cabinet Sizes
Cabinet dimensions vary widely, and selecting the right size is essential to optimize both functionality and visual appeal. Generally, cabinets are categorized into three types:
- Base Cabinets
- Standard height: 720mm (excluding countertop thickness)
- Depth: 600mm
- Wall Cabinets
- Heights: 300mm to 900mm
- Depth: 300mm to 400mm
- Tall Cabinets
- Heights: 1800mm to 2400mm
- Depth: 450mm to 600mm
“These standard measurements are a good starting point, but Mornington homeowners often benefit from custom cabinetry tailored to specific room layouts and personal preferences.” said Leona Rodriguesi of Mornington Cabinet Makers.
Key Factors to Consider When Choosing Cabinet Size
1. Room Dimensions
Start by measuring the space where your cabinets will be installed. Accurately measuring wall length, ceiling height, and depth ensures you avoid common pitfalls such as oversized cabinets that make the room feel cramped.
2. Purpose of the Cabinet
Think about what the cabinet will store. For example:
- Kitchen cabinets: Consider pots, pans, plates, and pantry items.
- Bathroom cabinets: Focus on toiletries, towels, and cleaning supplies.
- Garage or laundry cabinets: Account for bulky tools or appliances.
3. Ergonomics and Accessibility
Mornington’s homeowners often prefer practical designs that cater to all family members. For instance:
- Install wall cabinets at an accessible height for everyday items.
- Use deep base cabinets with pull-out drawers to maximize storage while ensuring easy access.
4. Style and Aesthetic
Whether you’re going for a Hamptons-style kitchen or a sleek modern look, your cabinet size should align with the overall design. Larger cabinets may work well in spacious kitchens, while smaller, minimalist options suit compact areas.
5. Appliance Integration
If you’re incorporating appliances like a built-in oven or refrigerator, ensure your cabinets are sized accordingly. Custom cabinetry can help create a seamless, integrated appearance.
Popular Cabinet Trends in Mornington
Mornington homeowners have access to a range of styles and designs that can complement the coastal charm of the area. Some trending ideas include:
- Soft-Close Drawers: Prevent noisy slamming and extend the lifespan of your cabinetry.
- Open Shelving: Combine with cabinets to create a modern yet functional kitchen.
- Custom Inserts: Spice racks, pull-out trash bins, and drawer dividers enhance usability.
- Natural Finishes: Wood tones and earthy hues are popular choices for Mornington’s coastal homes.
Local Expertise: Custom Cabinetry in Mornington
If standard sizes don’t meet your needs, consider working with a local cabinet maker in Mornington like Leona Rodriguesi of Mornington Cabinet Makers. Custom cabinetry allows you to:
- Maximize Storage: Tailor designs to awkward corners or underutilized spaces.
- Enhance Aesthetics: Match your cabinets to the unique style of your home.
- Support Local Craftsmanship: Mornington’s talented artisans can provide high-quality, bespoke solutions.
Some local businesses specialize in sustainable materials, ensuring your project aligns with eco-conscious values.
Measuring Tips for Mornington Homeowners
Accurate measurements are critical for choosing the right cabinet size. Follow these steps:
- Use a Reliable Tape Measure Always measure in millimeters for precision.
- Check Wall Straightness Use a level to ensure walls are straight, as uneven walls may require adjustments.
- Consider Electrical and Plumbing Ensure there’s enough clearance around outlets, pipes, or fixtures.
- Account for Door and Drawer Clearance Leave sufficient space for cabinet doors and drawers to open fully.
FAQs About Choosing Cabinet Size
Q: How do I choose cabinet size for a small kitchen?
For small kitchens in Mornington, prioritize efficiency by using taller wall cabinets to maximize vertical storage. Pull-out shelves and lazy Susans can help you optimize corners and tight spaces.
Q: Should I choose custom or stock cabinets?
Stock cabinets are more affordable and quicker to install, but custom cabinets provide a tailored fit and design that better suits unique spaces and personal preferences.
Q: How can I ensure my cabinets match my appliances?
Provide appliance dimensions to your cabinet maker or retailer. Many Mornington homeowners also choose custom cabinets to seamlessly integrate appliances like dishwashers and microwaves.
Conclusion
Choosing the right cabinet size doesn’t have to be overwhelming. By considering your room dimensions, storage needs, and personal style, you can create a functional and visually appealing space. Mornington’s local cabinet makers and retailers offer a wealth of expertise to guide you through the process. Whether you opt for stock or custom designs, the perfect cabinets can elevate your home’s aesthetic and functionality.
For Mornington residents looking to start their cabinetry journey, reach out to local professionals who understand the nuances of coastal living and provide personalized solutions. Your dream storage space is just a consultation away!